Razor Support for ASP.NET Core Apps in Visual Studio Code
VS Code now supports Razor for ASP.NET Core apps.
The beauty of a cross-platform framework like ASP.NET Core is your ability to choose tooling you prefer. With all its advantages, Visual Studio can sometimes be too powerful for what you need.
With ASP.NET Core, the days of being locked down to writing .NET in Visual Studio are over. For example, you can write your applications on editors like Visual Studio Code, whether you are on Mac, Windows, or a flavor of Linux.
Earlier this year, I spoke and wrote extensively about how to write an ASP.NET Core app with Visual Studio Code. As this support is evolving, you may notice experiences here and there that do not compare to using a full-fledged editor like Visual Studio—but if you are using Code for your Core apps you may find the trade-off worth it.
That gap is narrowing with the announcement that Visual Studio Code now has support for Razor, the .NET markup syntax engine that allows you to write dynamic views using .NET code and HTML markup.
As discussed in the announcement, this is very much in preview and has limitations. Read the article for details on what these limitations are, how to provide feedback, and how to disable it if you come across issues.
Take advantage of Razor support in Code
Before you look at Razor support in Code, create an ASP.NET Core application in Visual Studio Code. We will just create an application based on the ASP.NET Core web application template. For an in-depth tutorial on using ASP.NET Core with Code, you can review my blog post or an in-depth tutorial at the official Microsoft Docs site.
As prerequisites, make sure you have Visual Studio Code, the C# extension, and the .NET Core SDK installed.
Create a quick .NET Core web app in Visual Studio Code
From Visual Studio Code, enter the following commands from the integrated terminal (if you don’t see it, click Terminal > New Terminal):
dotnet new webapp -o TestRazorSupport
code --reuse-window TestRazorSupport
The first command uses the .NET Core CLI to create a new application based on the webapp template. The application now exists within a TestRazorSupport folder. The second command uses a Code command-line switch to open the application in your active Code window.
Now, you can open any view file (.cshtml) to experiment with Razor support.
Explore Razor support in Visual Studio Code
If you open a view—I will be looking at Pages/Contact.cshtml—you can see Razor support in action.
First, let’s update the ContactModel with some additional properties. Here’s what my Contact.cshtml.cs now looks like:
using System;
using Microsoft.AspNetCore.Mvc.RazorPages;

namespace TestRazorSupport.Pages
{
    public class ContactModel : PageModel
    {
        public string Message { get; set; }
        public string Name { get; set; }
        public string Email { get; set; }

        public void OnGet()
        {
            Message = "Your contact page.";
            Name = "Dave Brock";
            Email = "dave@myemail.com";
        }
    }
}
In Contact.cshtml, let’s access the Name property to check out the Razor support.

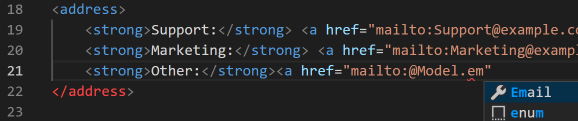
It works as you would expect—even inside HTML attributes—as we access the Email property:
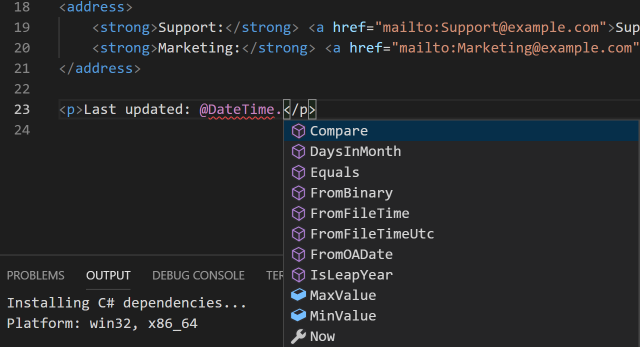
And if we access .NET APIs (and steal from the announcement) it works beautifully!